Generate tests based on a template
It can be a tedious work to create a test-suite. The creation of a test suite to check the structure of a cube with 500 measures and 40 dimensions quickly lead to a test-suite with more than 2500 tests! When writing this kind of test-suite, you’ll quickly understand that there is a lot of repetition in the xml. It’s a clue that we can automate or at least assist to the creation of such a test-suite.
To achieve this, there is tool named Genbi provided with NBi since the version 1.1. The basic behaviour of this tool is to generate multiple fragments of xml based on a template and a CSV file containing the values of different variables consumed by the template.
Prepare your CSV
For this sample, we’ll suppose that you’ve a cube with two perspectives named “Finance” and “Operation”. The first dimension will have three dimensions “Date”, “Customer” and “Invoice”, the second one will have “Date”, “Customer” and “Task”. We’ll create a CSV with two columns named “perspective” and “dimension”. Then, we’ll create one row by perspective and dimension. The final result will be:
perspective;dimension
Finance;Customer
Finance;Date
Finance;Invoice
Operation;Customer
Operation;Date
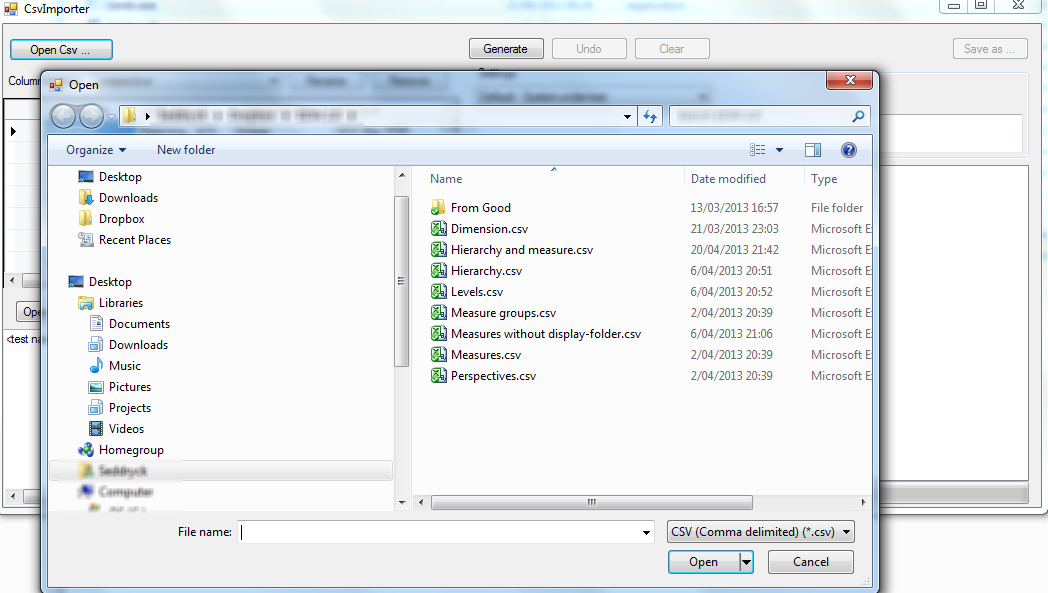
Operation;TaskSave your file with a CSV extension. When your file is ready, you can open it with Genbi. For this click on the button named “Open CSV …” and select your file.
Tune your CSV
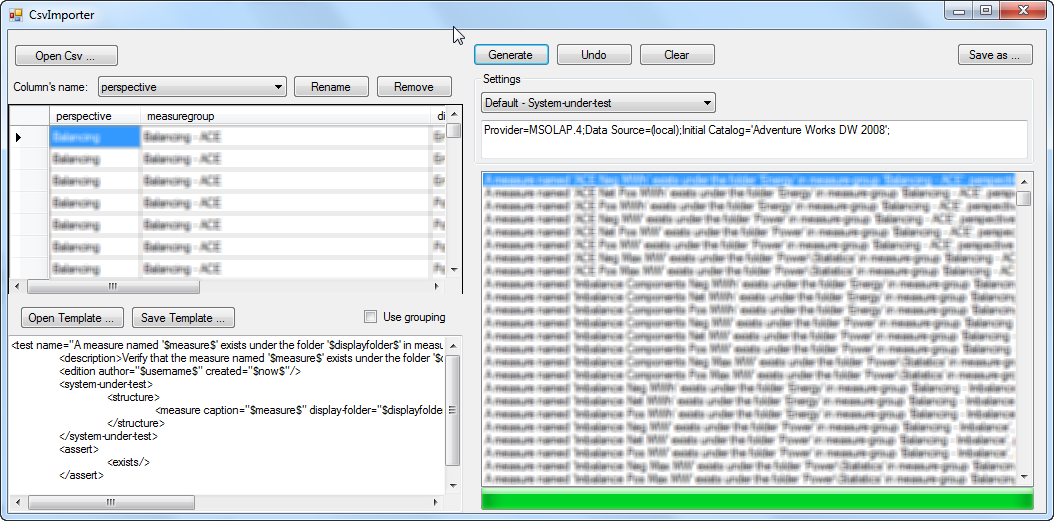
Genbi has filled a table and displayed the content of your CSV file.
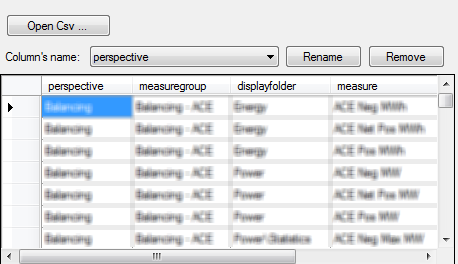
When your CSV file is opened in Genbi, you can to update it.
The most important feature is to be able to rename the headers of your column (By default, the value is the first line of your CSV). The names of your column header are really important because they will be used later in the generation process. The headers must match with the name of the variables that are in used in the template.
You can also add, remove or update rows directly in the table displayed in Genbi. You can also remove a column from the CSV. Note that all the changes applied at this moment are not persisted in your CSV file.
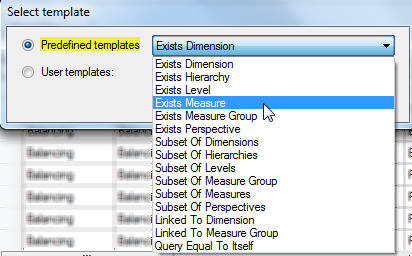
Select your template
You can open a template from the list of templates provided by Genbi or open an external file.
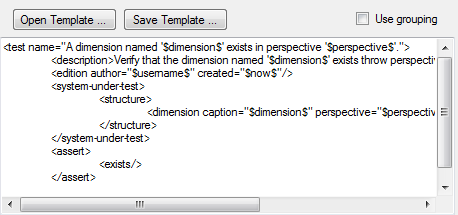
The template contains the xml of the test to generate with placeholder for the value of each variables. The placeholder are defined as the name of the variable surrounded by the symbol “$”. As a sample the following template will replace the word $perspective$ by the name of your perspective (Finance) and the word $dimension$ by the name of your dimension (Customer). Then we’ll restart this process for the next lines in your CSV.
<test name="$dimension$ of $perspective$"/>Will be transformed into the following 6 tests.
<test name="Customer of Finance"/>
<test name="Date of Finance"/>
<test name="Invoice of Finance"/>
<test name="Customer of Operation"/>
<test name="Date of Operation"/>
<test name="Task of Operation"/>
It’s possible to edit the template and save your edited version in an external file to use it again later.
Automatic variables
As discussed above, you can use the variables corresponding to the columns defined in your column header is the name of your variable and each correspond to a set of values for your variables. There are also a few intrinsic variables available
- user: return the login of the user currently connected when generating these tests
- now : return the date and time of the test generation
- time : return the time of the test generation
- today : return the date of the test generation
- uid : return an integer starting at 1 and increment for each test
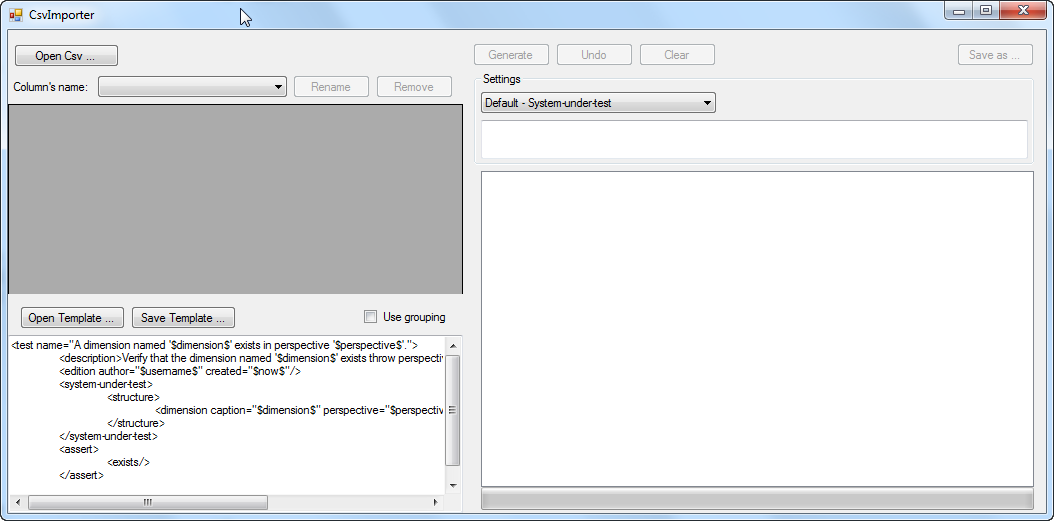
Generate
To generate your tests, just click on the button generate.
Valid tests
Before generating your tests, Genbi will check that they are valid from a syntax point of view. If your test is not syntactically valid, Genbi will complain that it can’t serialize your test. If your template make usage of un undefined variable, Genbi will also complain.
Other generation features
- The undo button will allow you to remove all the tests generated during your last attempt to generate tests.
- The button clear will completely clear all your tests
- The button save allow you to persist your tests into a test-suite file (nbits).
- Double clicking on a test will open a new window where you’ll be able to check the resulting test.
- Left click on a test will let you delete this test.
Use grouping option
The features described above are really nice if you want to generate a test where you haven’t a variable representing a set (multiple values). By example, the assertion named “subsetOf” requires that you’ve a set of value on which you’ll perform your test. You can achieve this by using the Use grouping option. This will transform your table into a kind of tree view where the first columns will define your test and your last column will define the set of values. It means that using the CSV described above we’ll generate 2 tests (2 distinct values in first column), each of them with a set of three values (last column).
Using the grouping option and the following template:
<test name="$dimension; separator=", "$ of $perspective$">The generation will result into the following 2 tests.
<test name="Customer, Date, Invoice of Finance"/>
<test name="Customer, Date, Task of Operation"/>
It’s also possible to use elements of the grammar of StringTemplate as functions or conditionals.
<test name="All dimensions in perspective '$perspective$' are a subset of these $length(dimension)$ elements">
	<description>Verify that all the dimensions visible through the perspective '$perspective$' are in the following list of $length(dimension)$ expected dimensions: $dimension; separator=", "$.</description>
	<edition author="$username$" created="$now$"/>
	<system-under-test>
		<structure>
			<dimensions perspective="$perspective$"/>
		</structure>
	</system-under-test>
	<assert>
		<subsetOf>
			<item>$dimension; separator="</item>
			<item>"$</item>
		</subsetOf>
	</assert>
</test>
will result into
<test name="All dimensions in perspective 'Finance' are a subset of these 3 elements">
	<description>Verify that all the dimensions visible through the perspective 'Finance' are in the following list of 3 expected dimensions: Customer, Date, Invoice.</description>
	<edition author="Myself" created="2013-04-27T14:40:12"/>
	<system-under-test>
		<structure>
			<dimensions perspective="Finance"/>
		</structure>
	</system-under-test>
	<assert>
		<subsetOf>
			<item>Customer</item>
			<item>Date</item>
			<item>Invoice</item>
		</subsetOf>
	</assert>
</test>

<test name="All dimensions in perspective 'Operation' are a subset of these 3 elements">
	<description>Verify that all the dimensions visible through the perspective 'Finance' are in the following list of 3 expected dimensions: Customer, Date, Task.</description>
	<edition author="Myself" created="2013-04-27T14:40:12"/>
	<system-under-test>
		<structure>
			<dimensions perspective="Operation"/>
		</structure>
	</system-under-test>
	<assert>
		<subsetOf>
			<item>Customer</item>
			<item>Date</item>
			<item>Task</item>
		</subsetOf>
	</assert>
</test>
Edit your settings
It’s also possible to edit the settings of your test-suite. In version 1.1, it’s possible to do this for Default values but not for Reference (will come later).

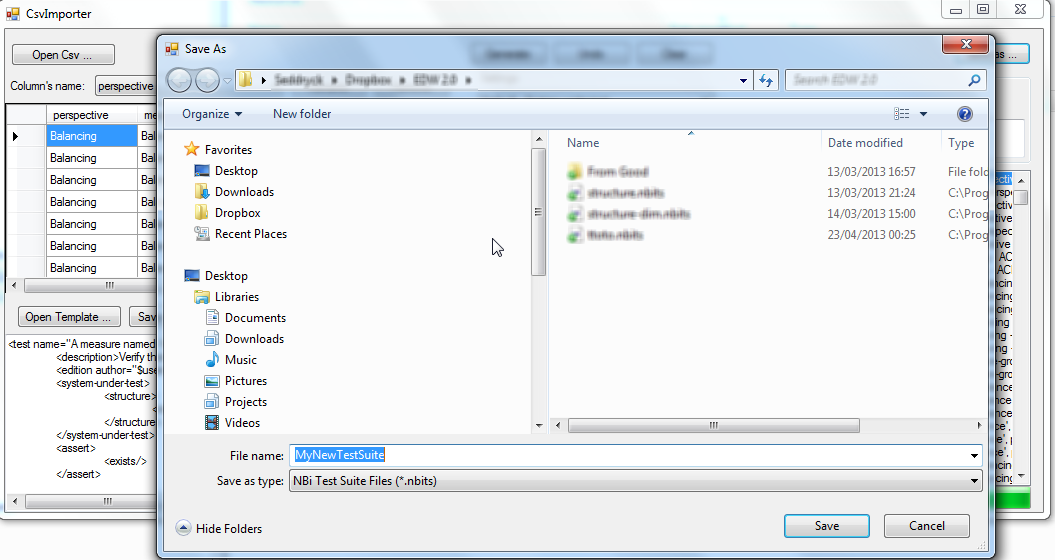
Save your tests suite
When all your tests are ready, you can save them into a new test-suite by clicking on “Save as …” button.