Build a test-suite (Azure DevOps)
Using Azure DevOps Pipelines, it’s possible to build your test-suite based on your genbiL file and other supporting files. This create a world of opportunity in terms of versioning of your test-suites.
In the following step-by-step example, we’ll connect to a directory at GitHub and build the test-suite defined in a file named dictionary.genbiL using the latest release of Genbi.exe available on GitHub releases.
The repository containing the fake test-suite is available on GitHub and Pipeline is available on Azure DevOps.
Setting up a new pipeline on Azure DevOps
We assume that you already have an account at Azure DevOps, if it’s not the case many tutorials to create an account are available online.
Once you’re connected to your Azure DevOps account or organization, create a new project. In this case we’ll name it “NBi.Cicd.Build*.
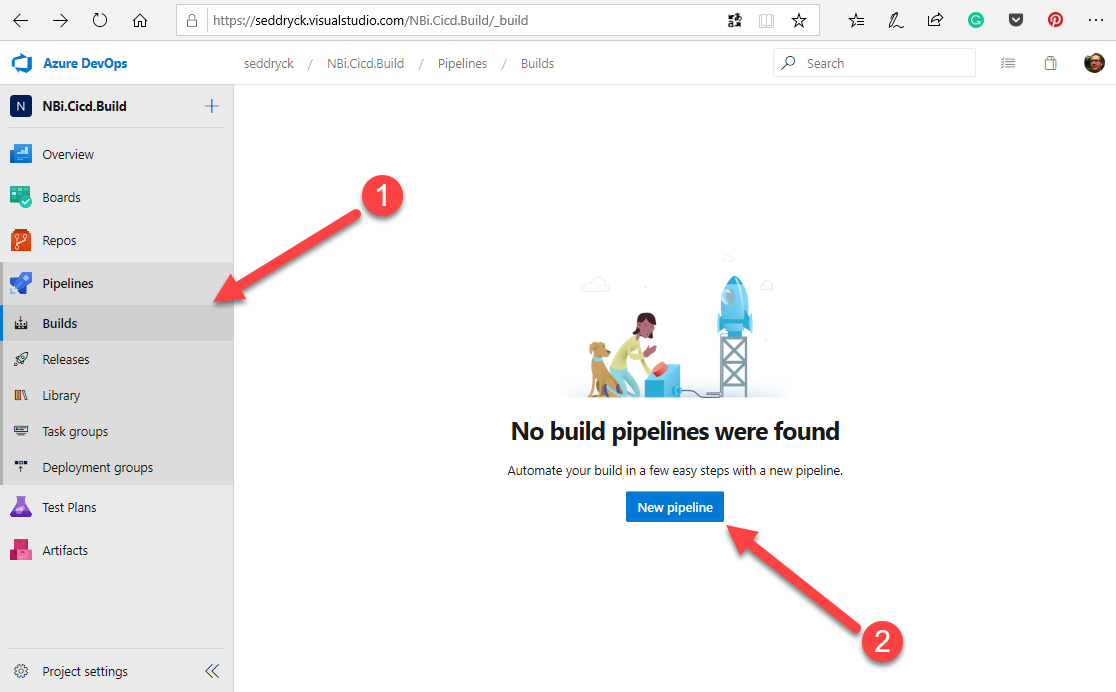
After this creation, you’ll have to create a pipeline. The first step is to use the navigation pane to go to pipelines/build and click on new pipeline.
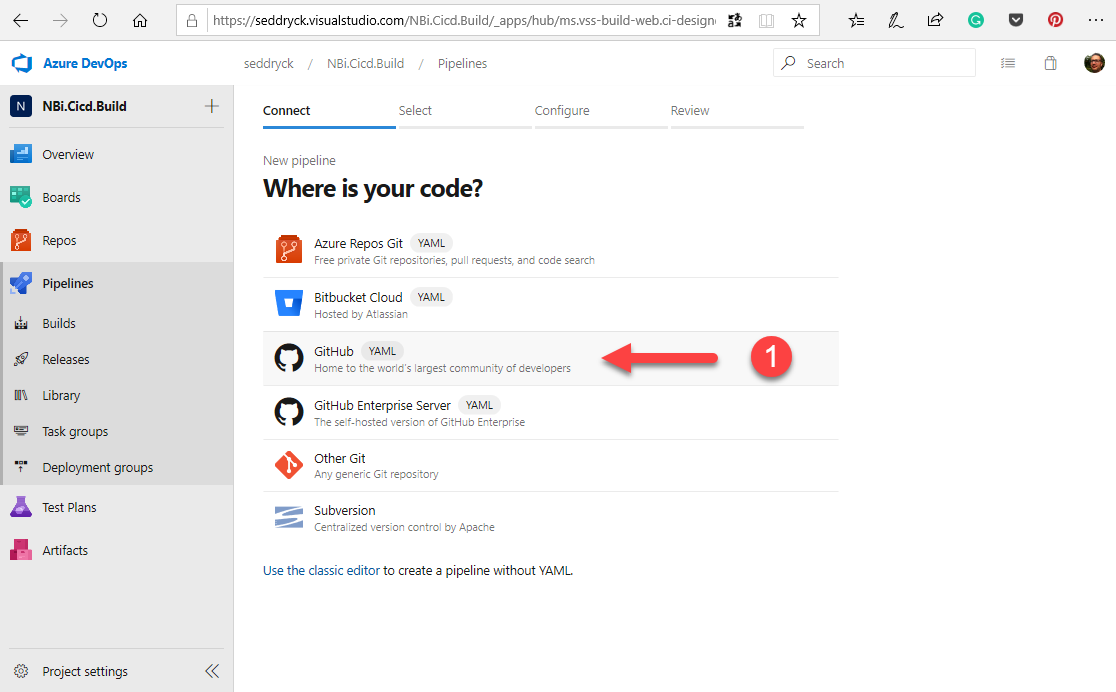
You’ll have first to specify that you want to connect to a repository on GitHub
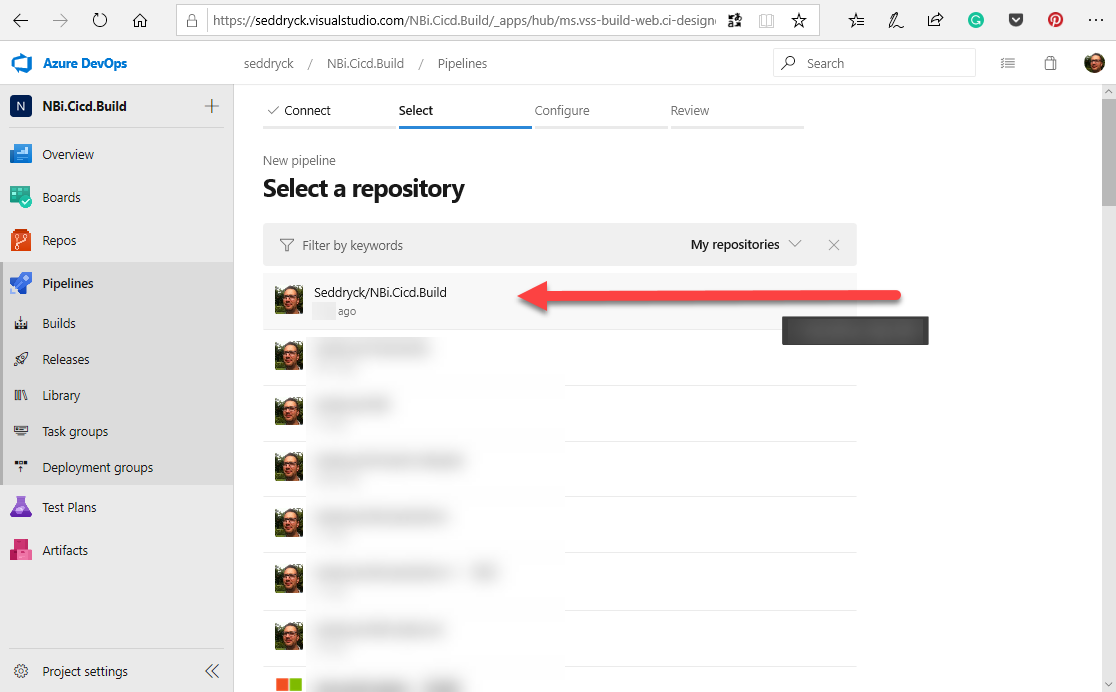
And then to select the repository
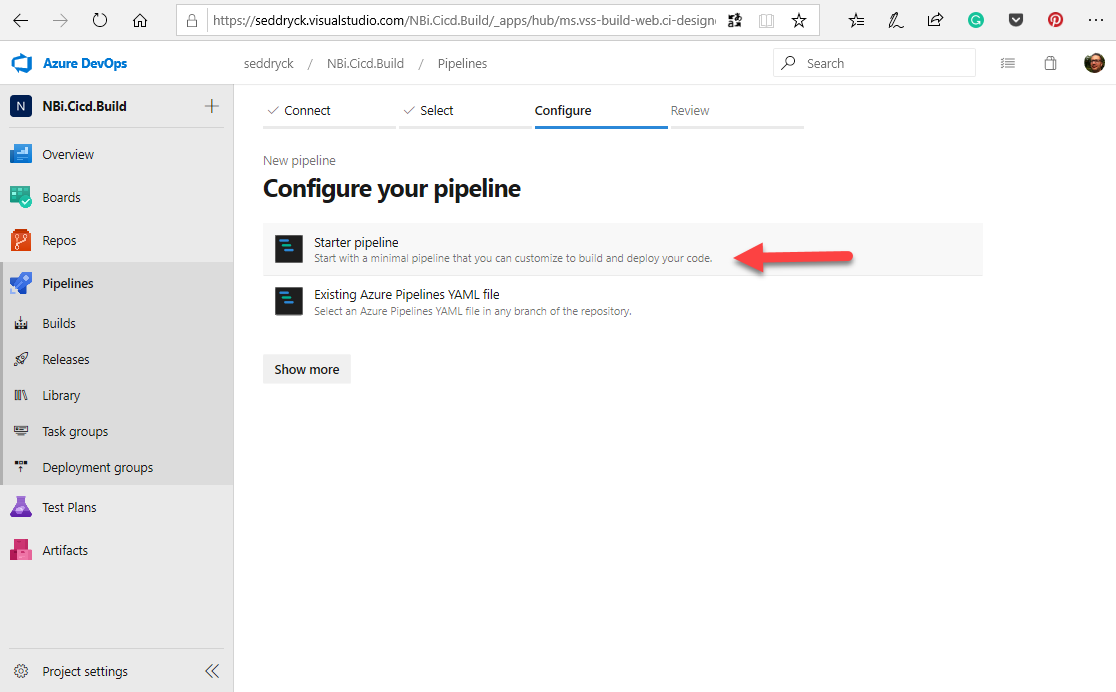
During the next step, you’ll have to specify that you want to create a new pipeline from scratch by selecting the option Starter Pipeline.
Configuration of the pipeline
Switch to windows based agent
genbi.exe only runs on windows, the first step will be to change the Ubuntu Virtual Machine of the build agent to a Windows version. To achieve this edit the vmImage information and replace by windows-latest.
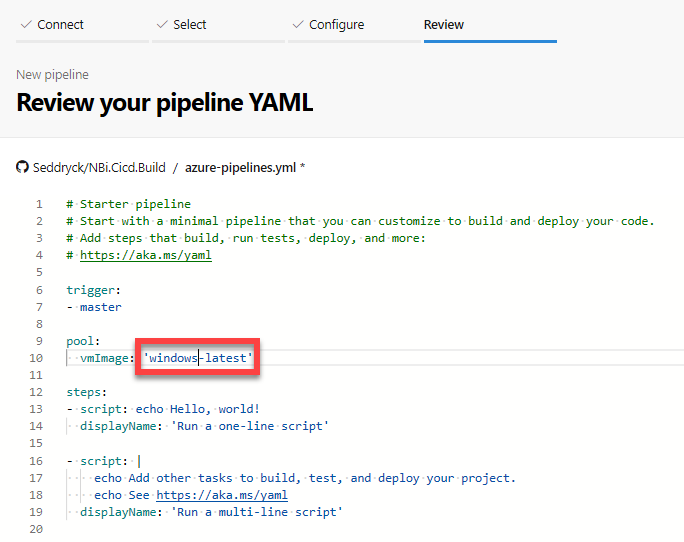
pool:
  vmImage: 'windows-latest'
Download and install genbi.exe
To download genbi.exe, you can rely on GitHub releases. For each major version a zip file including genbi.exe and all its libraries is available on the GitHub releases website. To quickly identify the latest release, you just have to append /latest at the base url: https://github.com/seddryck/nbi/releases/latest.
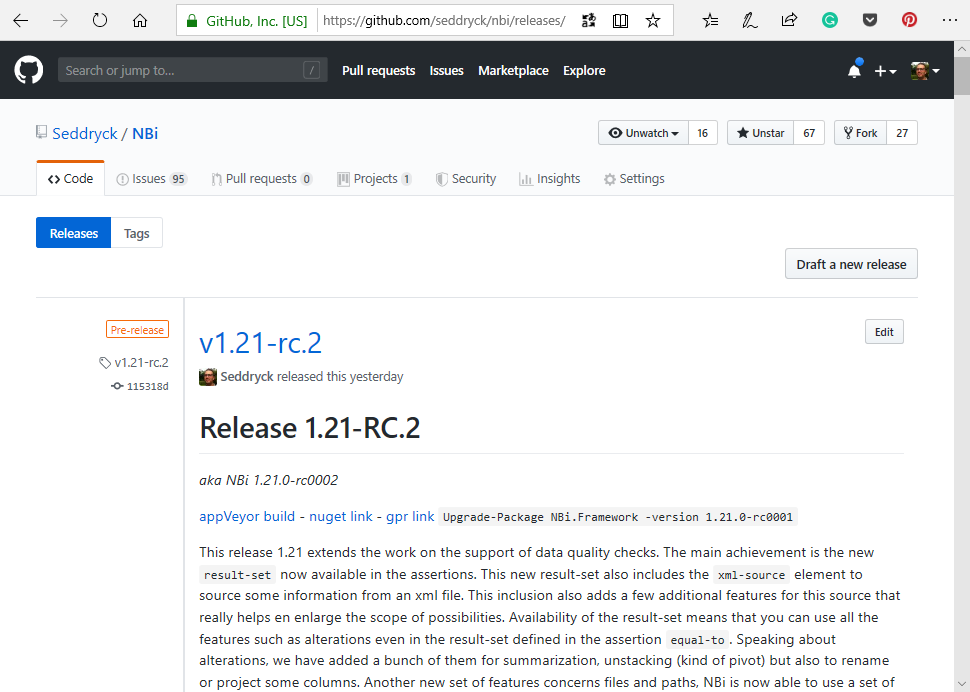
You can also access this information through the GitHub API at the following url: https://api.github.com/repos/seddryck/nbi/releases/latest.
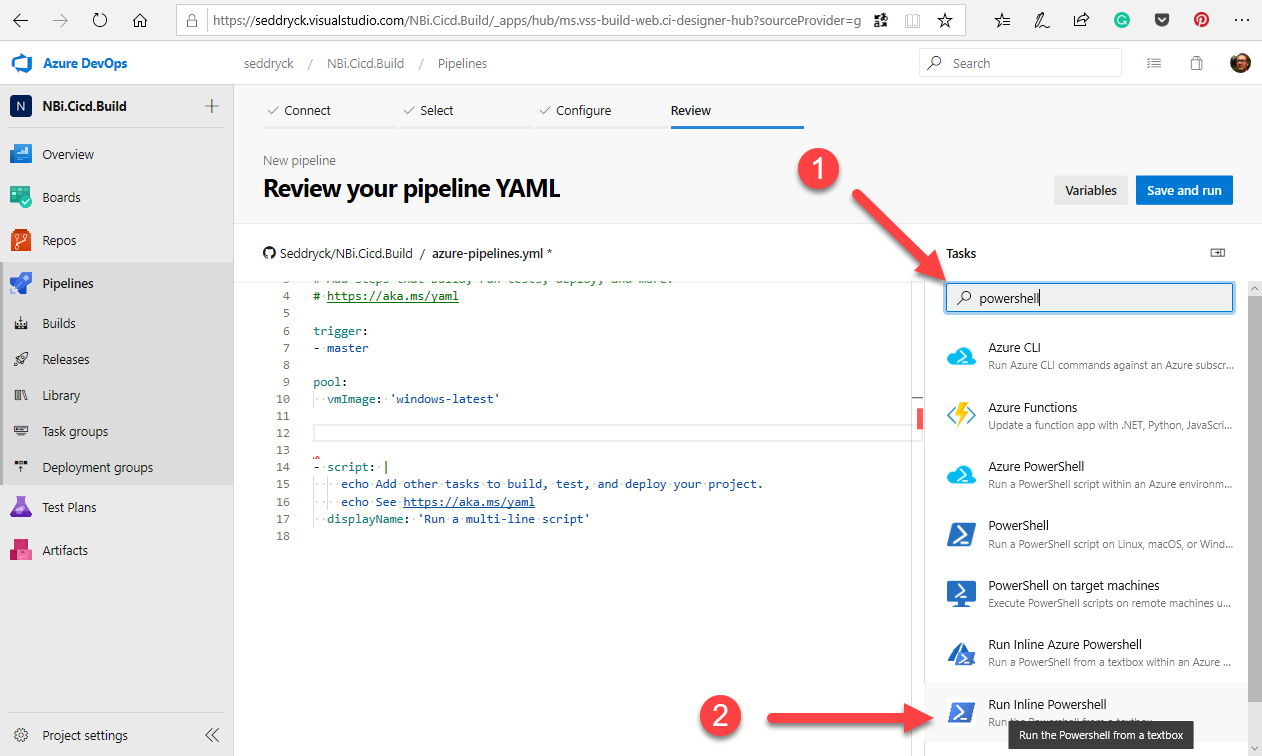
The following powershell script, let you parse the content of the API response and retrieve the tag name corresponding to the latest version and the public url to download the binaries. ast line of the script download the file and persist it on the artifcats directory.
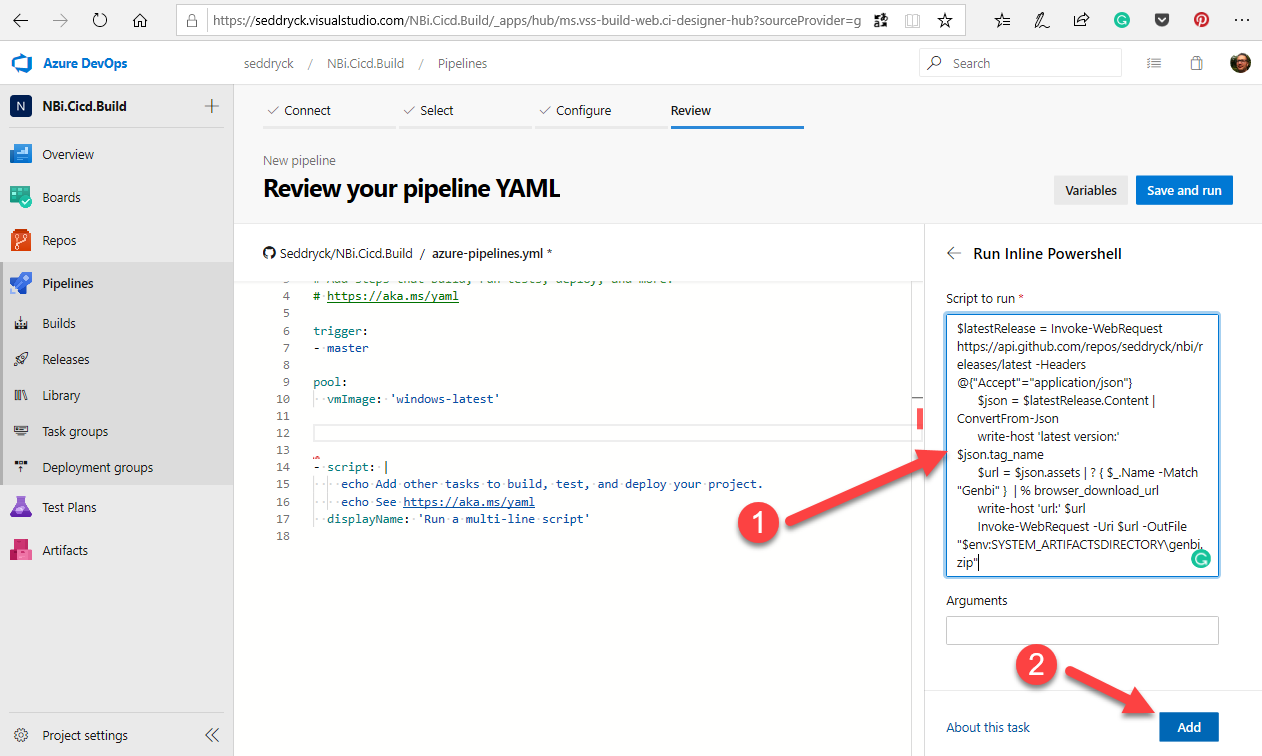
$latestRelease = Invoke-WebRequest https://api.github.com/repos/seddryck/nbi/releases/latest -Headers{"Accept"="application/json"}
$json = $latestRelease.Content | ConvertFrom-Json
write-host 'latest version:' $json.tag_name
$url = $json.assets | ? { $_.Name -Match "Genbi" }  | % browser_download_url
write-host 'url:' $url
Invoke-WebRequest -Uri $url -OutFile "$env:SYSTEM_ARTIFACTSDIRECTORY\genbi.zip"
You can execute this script in your pipeline by adding a Run Inline Powershell task. Search for a powershell task and select the task named Run Inline Powershell.
Then copy paste the script and click on add
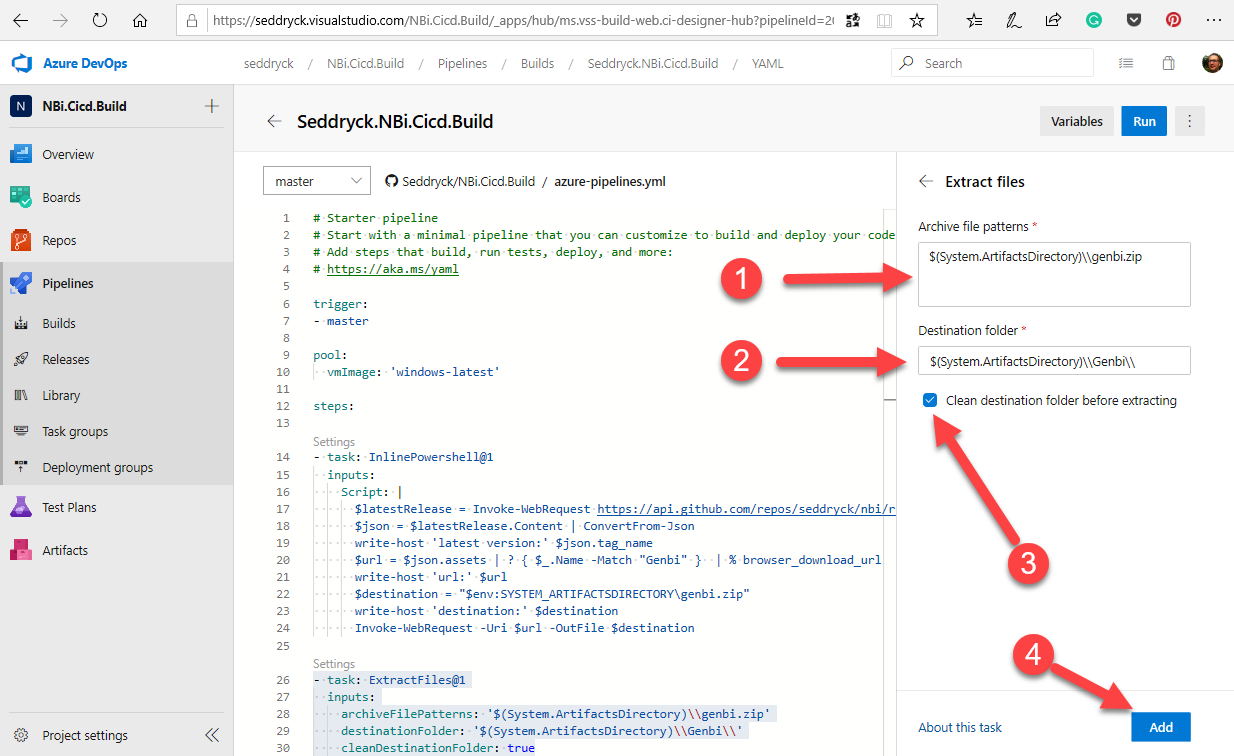
Once the file has been download, you’ll need to extract it. You can achieve this by using a task Extract files. Search for a Extract task and select the task named Extract files.
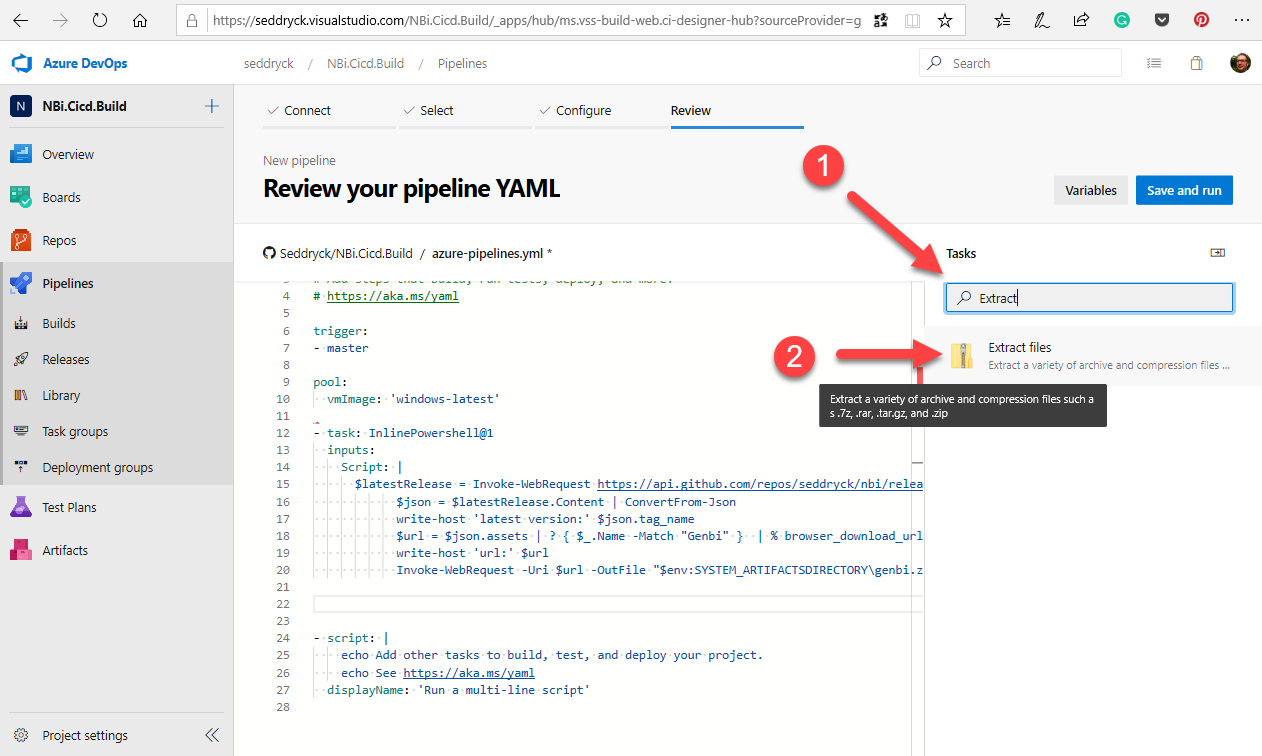
Fill the different parameters of the task. don’t forget to clean the folder before unzipping and to double the backslashes.
Run genbi.exe
Once downloaded and unzipped, genbi.exe is ready to use. You can call it through a command line passing in parameter the path to your genbiL file and the option -q to avoid interactive pop-ups.
Search for a Command task and select the task named Command line.

then write the following script
$(System.ArtifactsDirectory)\\Genbi\\genbi.exe $(System.DefaultWorkingDirectory)\\dictionary.genbiL -q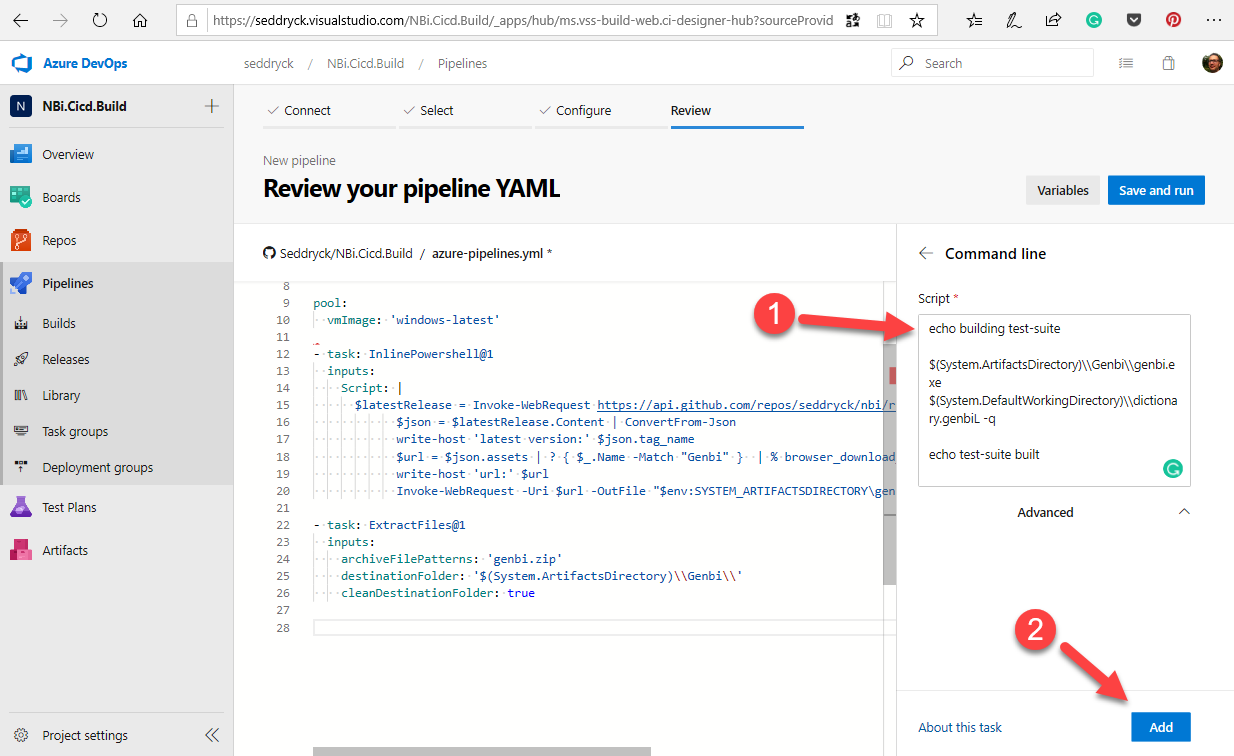
Promote the output as artifact
Now that the test-suite has been created, we’ll need to promote it as an artifact. A first task will copy the test-suite to the staging directory and a second will transform the content of the staging directory to a zip file that will be available as an output of the pipeline (artefact).
Select the task copy files
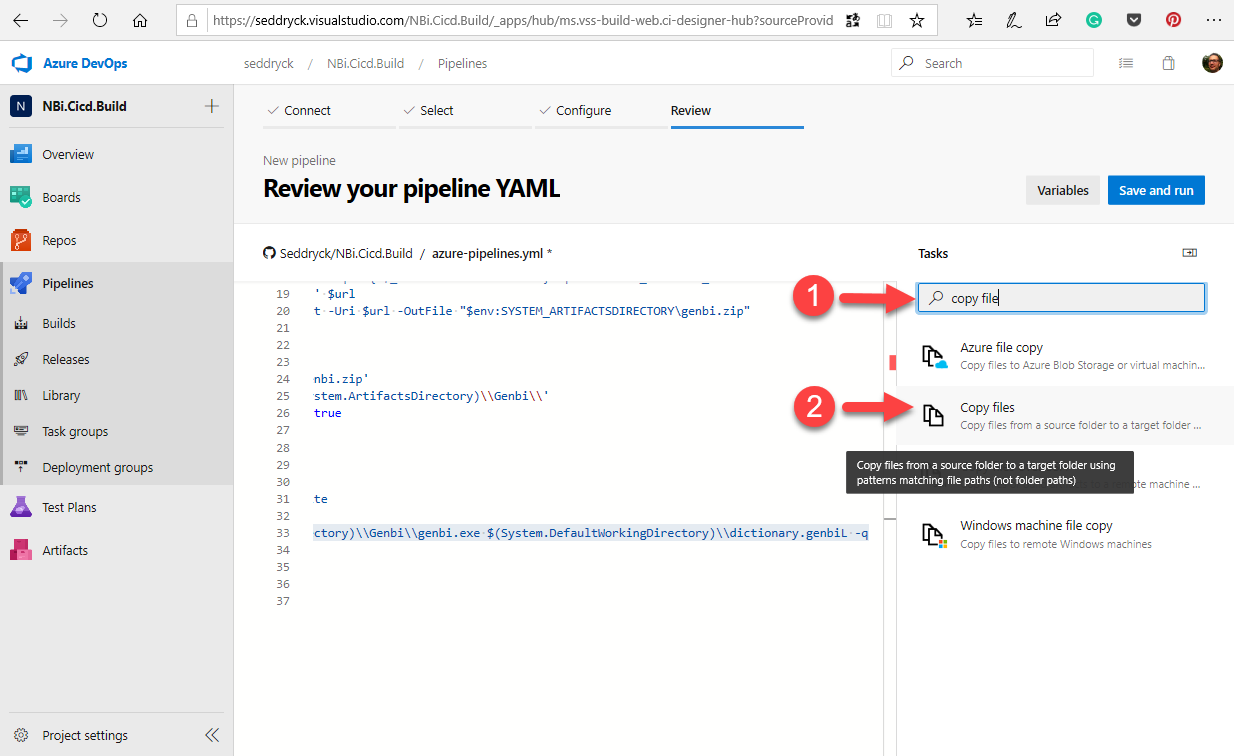
and fill the parameters. Pay attention to clean the folder before copying the nex test-suites.

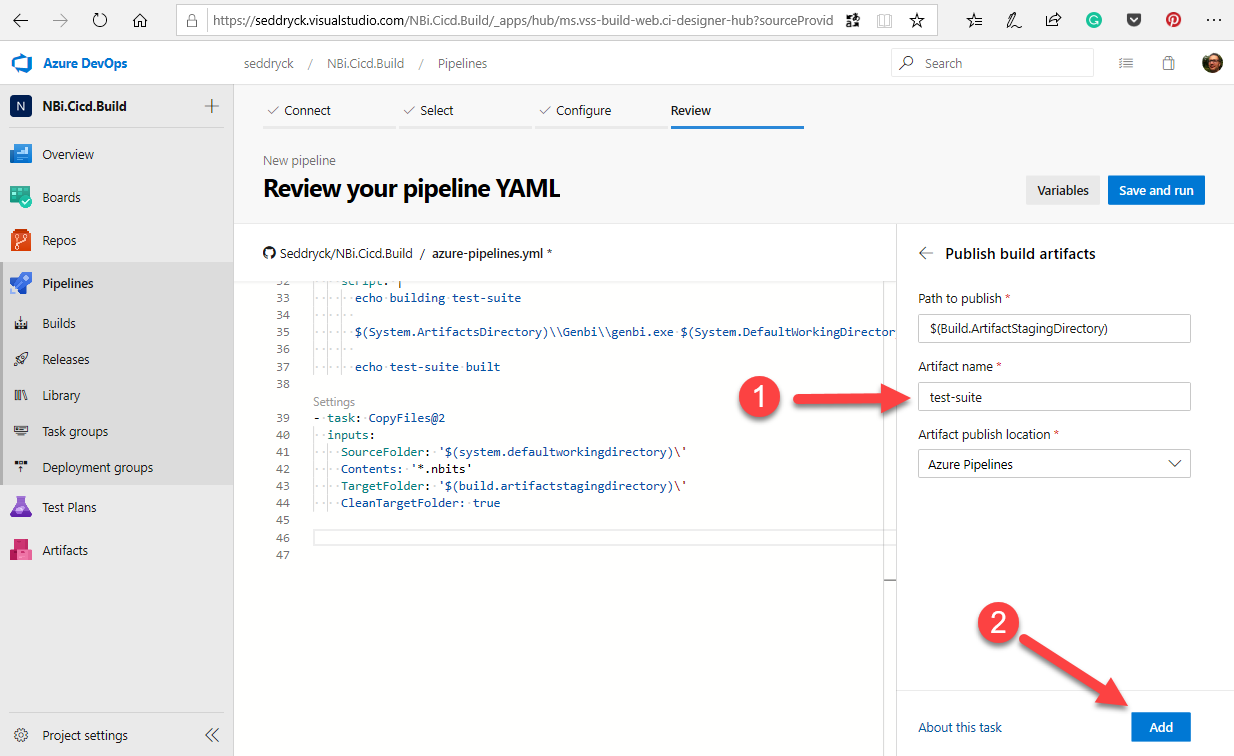
Once, the test-suite is available in the staging directory, we can publish the content of this directory as an artifact. To do this, use the task publish build artifacts
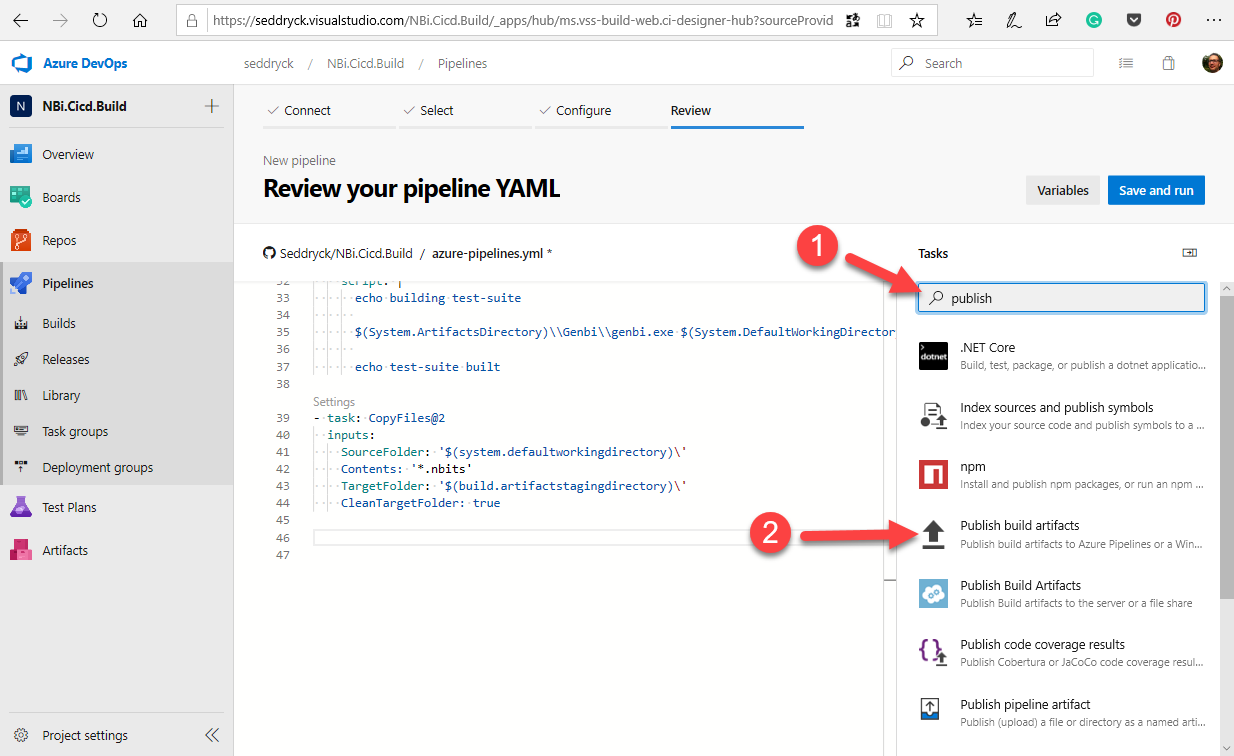
and don’t forget to rename this artifact test-suite
Trigger the pipeline
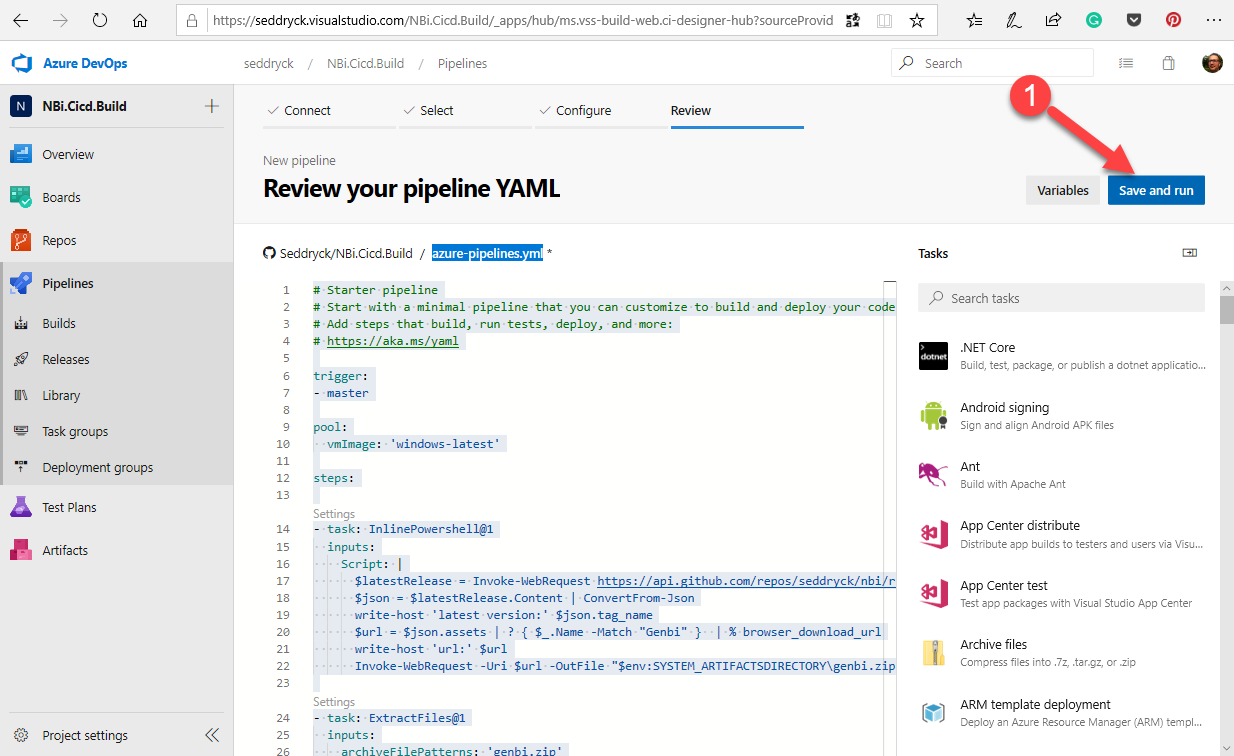
Once the pipeline defined, don’t forget to save it. This save will trigger the upload of a file named * azure-pipelines.yml* in your GitHub repository. Due to the change in this repository, it will also trigger the pipeline on Azure DevOps.
If later you update any file in this directory, it will also trigger the pipeline.
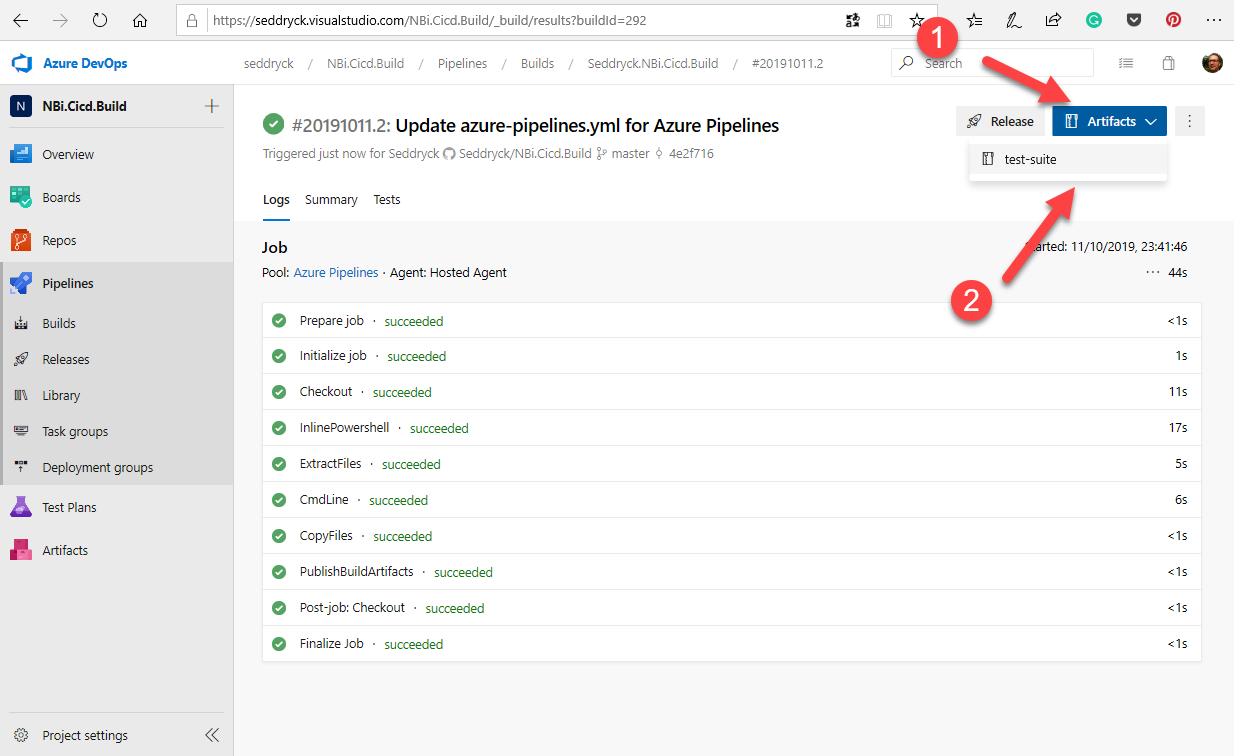
Download artifact
Once the pipeline has completed, the artifact is available and can be downloaded or consummed by another pipeline.
The full script of the pipeline is available on GitHub and the result of this pipeline execution is also visible on Azure DevOps.